Best Bike Handler Regripping Service In Iowa City
Mobile Mechanics of Iowa City Iowa City
Bike Handler Regripping Service near Iowa City IA: Are you looking for the BestBike Handler Regripping Service near Iowa City IA ? Mobile Mechanics of Iowa City Iowa City, we are sure to clearly indicate what to expect out of the tune-up, cleaning or repair that’s going to happen- and they will carefully explain what they recommend, always respecting your choices and your budget. Cost? Free estimates! Send us a message or call us today. Best Bike Handler Regripping Service around Iowa City IA. We serve Iowa City IAand other areas. Get a Free Quote Now!
BEST BIKE HANDLEBAR REGRIPPING SERVICE IN IOWA CITY IA
IOWA CITYBIKE HANDLEBAR REGRIPPING
Getting you squared
Bike Handler Regripping Service near Iowa City IA: When you bring in your bike for service, our staff will discuss your needs in terms of what is necessary and what you would like to see done.Mobile Mechanics of Iowa City Iowa City, they’ll be sure to clearly indicate what to expect out of the tune-up, cleaning or repair that’s going to happen- and they will carefully explain what they recommend, always respecting your choices and your budget.
Walk-ins welcome
We’re happy to help out with a quick flat tire replacement or a minor repair on the fly- enough to get you up and out the door on a ride.Mobile Mechanics of Iowa City Iowa City, we do not take appointments for our full tune up service, so if you need anything from a quick tune to an overhaul, just drop by with your bike and one of our technicians will assess your bike, write up a quote with any additional parts that are required, and walk you through all the prices and repairs. If you choose to go ahead with the tune up we will inform you when your bike will be ready for pick up (usually 2-3 days in season) and we will see you then!
Bike repair – bike maintenance
Professionally trained and certified
All bicycle makes and models are accepted here, not just the ones we sell. And every member of our service team participates in training sessions with factory service techs several times each year.
Whether it’s a minor tune-up or a major overhaul where we go completely through your bicycle and get it running like new, you can count on us to do the job right the first time, every time.
How to Wrap Handlebar Tape the Smart Way
Bike Handler Regripping Service near Iowa City IA: Putting on new handlebar tape is a simple way to give your bike a visual lift as well as improving the grip, comfort and ride quality of your bike. It’s a cheap and easy way to treat your bike to some TLC. Here’s how to be a wrap star.
Our guide below shows you what we believe is the best method to wrap bar tape. We’ve included a list of the tools and materials that you will need to complete the job and in some cases where you can buy them. If there are others that you prefer then feel free to let everybody know in the comments.
Tools & Materials
- Fresh tape such as Pro Bike Gear tape(link is external)
- Degreaser such as Morgan Blue Chain Cleaner(link is external) or Green Oil Clean degreaser(link is external)
- Scissors and or scalpel
- Electrical tape
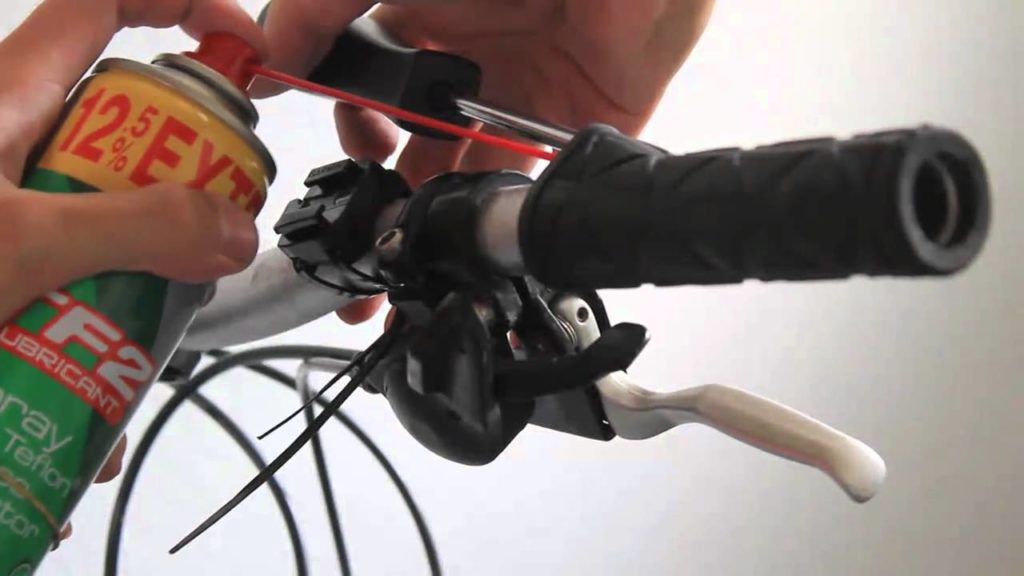
- Clean the bar. Clean handlebar and ensure there’s no glue residue from the old tape. Tape the control cables to the bars, using the appropriate grooves if your bar has them (or internal ports). Roll back the lever hoods to expose the bar clamps and finally remove the bar-end plugs. Stick the ends of two three inch long sections of electrical tape to the stem (you’ll see why in a moment). You’re now ready to start.
- Clamp covers. Most tape packs have two spools of tape, one per side. There are usually a couple of short sections for use in covering the clamps of the levers and a pair of branded logo tapes to finish the final end. Opinion is divided over using the clamp cover pieces, some like them, others prefer less bulk behind the lever clamp. Personally, we like using them. Trim them to exact length and apply the clamp cover section.
- Remove tape backing. Peel off half the waxy tape leader which covers the adhesive strip on the underside of the tape. Rip off the bit you’ve peeled off. Beginning on the underside of the open end of the bar and, leaving a half inch over the end, put a full turn on the bar. Remember to turn the tape from outside to inside. As you look down at the bars the tape turns should fan diagonally and backwards and outwards.
- Overlap the wrap. As the first turn completes begin to angle the tape up the bar. Each new turn of tape should overlap about a third of the previous turn. Apply an even pull force on the tape (it’s generally made to be a bit stretchy) this will ensure an even thickness and width as the bar begins to curve. Check you’ve not left any gaps or puckers.
- Perfect wrap. If you’re not happy with a wrap, just back off the tension and unwrap back to the last bit you’re happy with. If everything is good, you’ll get to the lower edge of the lever body. Allow a small overlap of a millimeter or two to ensure there are no gaps.
- Taping around the shifters. Continue by wrapping a figure of eight of tape around the lever body. You’re looking to position the tape, in conjunction with the separate bar clamp cover section to completely cover the exposed handlebar. It can take a few goes to get it just right. Don’t be afraid to undo and reposition for a pro looking finish.
- Taping the tops. Once clear of the levers, you’re wrapping around the top bend of the bar. Remember to try and make the turn with even quadrants. Too much or too little overlap and the feel of the bar will be off and it’ll look odd.
- How far to wrap. We wrap either to the bulge of the Centre section or to the graphic on a regular road drop bar. On flattened aero bars the trend is to finish on where the forward extension begins. That said we’ve seen them fully wrapped for comfort. Remember it’s your bar and you ride the bike, so wrap it so you’re happy and comfortable.
- Tape trim. With the last wrap complete, trim the excess with a long diagonal cut to allow the end to finish flush with the end of the last complete turn. Use one of the short sections of electrical tape to secure the trimmed end neatly into the end of the final turn. Finish with the logo tape supplied with the bar tape.
- Add the end plugs. Now go back to the end of the bar, where you began the taping, and carefully fold the overhanging ends of tape into the open end of the handlebar. Making sure none of them unfolds, use them to wedge the bar end plugs firmly into position. They should make a neat flush fit. Flip the lever hoods back into their riding position.
TIPS
Bike Handler Regripping Service near Iowa City IA: It’s easy to get caught up in the latest cycling innovations and trends, but sometimes it’s best to go back to basics and take a second look at the seemingly innocuous things that actually have a big impact on riding. For instance, the way you grip your handlebars. If you haven’t yet, it’s worth spending a little time considering how this little factor makes a big difference on your cycling experience.
According to Cycling About, grips make one of the largest differences to overall comfort while riding. Take a look at these tips to make sure you’re getting the most out of your handlebars.
Choose the right grip for the job
To have the best experience with your bike, it’s important to understand the different types of handlebar grips and their unique characteristics and uses. Cycling About separated grips into three main categories: silicone, ergonomic and foam.
Silicone is resistant to UV rays, which means that their color won’t fade over time and they are longer-lasting. They are light and can be cleaned easily. The source added that they have the best absorption abilities and are also very comfortable to hold. However, silicone grips can tear easily, so they require the use of bar ends.
Ergonomic grips are designed to provide optimal support for your wrists and posture during long rides. Cycling About recommended that cyclists adjust the bars so that they are a little lower than where your wrists would normally be positioned.
Finally, foam grips work well in wet weather and are lightweight. However, they wear out over time and the harder versions can be uncomfortable to hold for a long duration. Bar caps can help keep them from tearing, though.
Take it easy
Even cyclists who have been riding for years may never have stopped to think about how they’re gripping their handlebars. In fact, grip plays a large role in performance. Use a light, relaxed grip, recommended Training Peaks. This helps keep blood pressure low, saves energy and reduces muscle strain, making for a more enjoyable ride.
Know your tape
The tape you choose also affects performance. Cycling Tips explained that cotton tape was typically the go-to prior, when cork ribbon was introduced. Nowadays, cork-blend or synthetic tape are what you’ll most likely encounter. When applying tape, make sure you stretch and wrap it carefully so it doesn’t unravel after a few rides. However, if using cork tape, take care to not overstretch it, since it snaps easily. To fully secure the tape to the bars, Cycling Tips recommended using electrical tape to keep the ends of the grip tape on, and then finishing with plugs on the other end of the handlebars.
Leather tape is also a great option for bikes. It looks great and provides a strong grip. It can be a little pricier but is a worthwhile investment because it lasts for years. Cycling Tips noted that some adoptees of leather tape say that the material actually improves as time goes on.
COST
Re-Grip Your Bike Handler and How Much Does It Cost?
Bike Handler Regripping Service near Iowa City IA: It is possible for you to re-grip your own clubs by getting all of the materials you need and getting to work.
This is a good way to save some money and make sure that you get exactly what you want. It is more time-consuming than visiting a professional, but many players enjoy this type of work.
At the minimum, you’ll need to have the grips you want, a sharp blade to remove the existing grip, grip tape, and some epoxy.
The basic job is to remove all of the existing grip and epoxy from the shaft and clean it off. Once the shaft is cleaned and prepped, you can add more epoxy and slip the new grip right on. This is just a basic idea, so be sure to follow the instructions provided by the manufacturer.
Go to a Pro Fitter
If you’re a beginner, you really should think about going to a professional club fitter to have the grips put on for you. The cost may be a little more than the DIY version, but it is definitely a great option. When the professional re-grip for you, the club will feel new again which is essential.
Another great reason for having the work done for you is that the grip will be put on the right way.
Some of the grips made for beginning and amateur golfers have patterns on them that show you how to properly grip the club. If you use these grips and like having the visual aids, a professional fitter will be able to put the grips on properly.
The Costs Involved in Re-Gripping
As with most things in life, the cost to regrip golf clubs varies on many factors. The regrip cost will depend on the type of grip you want, the materials costs, and any labor. You should be able to get an accurate estimate from the professional who is fitting the club for you.
FREQUENTLY ASKED QUESTIONS
How do I fix handlebar grips?
If yours work loose, remove the grips completely and clean the handlebars of any glue residue. Then, spray the bars with hairspray, and replace the grips. After 20-30 minutes, the grips will be fixed in place – you’re ready to ride again.
How do you secure bike grips?
Cost-Effective Ways to Keep your Dirt Bike Grips Secure
Some bikers swear by using hairspray as an adhesive. Simply spray a thin layer of aerosol hairspray onto your handlebars, and fashion the grips over the spray. The hairspray should dry in half an hour, and keep your grips on tight for the day.
How do you put on bike grips without hairspray?
My solution was to use a bit of rubber cement. You only need to apply a little to the bar and inside of the grip. While the cement is still wet, it will slide on smoothly, then dry and secure nicely. Be sure to wipe off any excess that accumulates as you slide the grip on.
How do you remove handlebar grips without destroying them?
Use Dish Soap and Water
If you’re looking for an even more common method but don’t want to leave behind any residue, using good old fashion water and dish soap is a great way to remove your Bike Grips without damaging them.
How do you put streamers on a bike?
It’s simple! Just pinch the metal clip ends together and insert one end at a time into the hole in your handlebar grip. Once both ends of the clip are inserted, push the length of the metal clip in until the round part is touching the grip hole. Ideally, you want the ‘neck’ of the clip to fit snug at the grip hole.
CALL US FOR:
- Bike Handler Regripping Service Near Iowa City IA
- Bike Handlebar Tape
- Handlebar Grips
- Handlebar Grip Wrap
- Best Handlebar Tape
- How To Change Handlebar Grips On A Mountain Bike
- How To Wrap Bike Handlebars
- How To Put On Bike Grips Without Hairspray
- How To Install Handlebar Grips On A Motorcycle Near Iowa City IA
- Bike Handle Grip Price
- Two Wheeler Handle Grip Cover
- Bike Handle Grip Wrap
- Bike Handle Grip Cover
- Handle Grip For Cycle
- Cycle Handle Grip
- Motorcycle Handle Grips Online
- Bike Handle Grip With Light Near Iowa City IA
Service Area
- Coralville Bike Handlebar Regripping near me
- Hills Bike Handlebar Regripping near me
- Iowa City Bike Handlebar Regripping near me
- Johnson County Bike Handlebar Regripping near me
- Kalona Bike Handlebar Regripping near me
- Lone Tree Bike Handlebar Regripping near me
- North Liberty Bike Handlebar Regripping near me
- Oxford Bike Handlebar Regripping near me
- Riverside Bike Handlebar Regripping near me
- Solon Bike Handlebar Regripping near me
- Swisher Bike Handlebar Regripping near me
- Tiffin Bike Handlebar Regripping near me
- University Heights Bike Handlebar Regripping near me
- West Branch Bike Handlebar Regripping near me
- West Liberty Bike Handlebar Regripping near me
BEST BIKE HANDLEBAR REGRIPPING SERVICE IN IOWA CITY IA
Mobile Mechanics of Iowa City
REQUEST MORE INFORMATION. CONTACT US NOW!
Contact Details
Mobile Mechanics of Iowa City
Best Mobile Mechanic & Mobile Mechanics of Iowa City in Iowa City Iowa
CALL: (319) 471-4726 MOBILE MECHANIC 1
CALL: (319) 359-6136 MOBILE MECHANIC 2
CALL: (319) 471-4590 TOWING & ROADSIDE ASSISTANCE
OPEN 7 days 24 Hours
SERVICE AREA: Iowa City IA
ABOUT US
Mobile Mechanics of Iowa City: Since 2018 Mobile Mechanics of Iowa City has been providing reliable mobile repair services to Iowa City and surrounding areas. Our mechanics cover a 75 mile radius around Iowa City and are capable of handling any vehicle problems you may have with your truck, RV, or car. We provide mobile mechanic services 24/7 and we’re just a call away from getting you going again.
Onsite Automobile Mechanic Iowa City: With our traveling mechanic service, we will come to your aid and rescue. We can help and get you and your car back on the road. Mobile Auto Repair, We Bring the shop to you. Onsite car and automobile 911 repair service. Your Car’s local emergency services on the go near Iowa City, IA.
#mobilemechanicIowaCity
#mobileautorepairIowaCity
#mobiletruckrepairIowaCity
#onsiteautorepairIowaCity
#roadsideassistanceIowaCity
#24hourautorepairIowaCity
#24hourtruckrepairIowaCity
CALL US FOR
- 24 Hour Auto Repair
- 24 Hour RV Repair
- 24 Hour Truck Repair
- Auto Repair Shop
- Auto Repair Shops and Mechanics
- Batteries
- Car Repair
- Car Repair and Maintenance
- Car Service
- Emergency Auto Services
- Flat Tire Repairs
- Jumpstarts
- Mechanic
- Mobile Mechanic for Cars
- Mobile Mechanic for RVs
- Mobile Mechanic for Trucks
- Mobile Repair
- Mobile Welding
- On Site Auto Repair
- On Site Brake Repair
- Radiators
- Roadside Assistance
- RV Mobile Mechanic
- Shocks & Struts
- Starters & Alternators
- Tow Truck
- Towing
- Truck Repair
- Your Mechanic
SERVICE AREA
74 Cities within 30 miles of Iowa City, IA
Ainsworth, IA | Amana, IA | Atalissa, IA | Atkins, IA |Bennett, IA |Blairstown, IA |Cedar Rapids, IA | Center Junction, IA |Clarence, IA | Columbus City, IA | Columbus Junction, IA | Conesville, IA | Conroy, IA | Coralville, IA | Crawfordsville, IA | Ely, IA | Fairfax, IA | Fruitland, IA | Grandview, IA | Harper, IA | Hiawatha, IA | Hills, IA | Homestead, IA | Kalona, IA | Keota, IA | Letts, IA | Lisbon, IA | Lone Tree, IA | Lowden, IA | Marengo, IA | Marion, IA | Martelle, IA | Mechanicsville, IA | Middle Amana, IA | Morley, IA | Moscow, IA | Mount Vernon, IA | Muscatine, IA | New Boston, IL | Newhall, IA | Nichols, IA | North English, IA | North Liberty, IA | Norway, IA | Olin, IA | Ollie, IA | Oxford, IA | Oxford Junction, IA | Palo, IA | Parnell, IA | Richland, IA | Riverside, IA | Robins, IA | Shellsburg, IA | Solon, IA | South Amana, IA | South English, IA | Springville, IA | Stanwood, IA | Swisher, IA | Tiffin, IA | Tipton, IA | Van Horne, IA | Walford, IA | Wapello, IA | Washington, IA | Watkins, IA | Wellman, IA | West Branch, IA | West Chester, IA | West Liberty, IA | Williamsburg, IA | Wilton, IA | Wyoming, IA
Near Zip Codes: 52244 – Iowa City, IA | 52242 – Iowa City, IA | 52245 – Iowa City, IA | 52243 – Iowa City, IA | 52246 – Iowa City, IA | 52235 – Hills, IA | 52241 – Coralville, IA | 52240 – Iowa City, IA | 52340 – Tiffin, IA | 52317 – North Liberty, IA | 52327 – Riverside, IA | 52333 – Solon, IA | 52755 – Lone Tree, IA | 52247 – Kalona, IA | 52358 – West Branch, IA
VEHICLES SERVICED
Cummins Mobile Mechanic | Freightliner Mobile Mechanic |International Mobile Mechanic |Peterbilt Mobile Mechanic| Cascadia Mobile Mechanic |Western Star Mobile Mechanic |Heavy Duty Mobile Mechanic |Semi-Trailer Mobile Mechanic | Semi-Trailer Mobile Mechanic |Mack Mobile Mechanic | Kenworth Mobile Mechanic |Acura Mechanic | Audi Mechanic | BMW Mechanic | Buick Mechanic | Cadillac Mechanic | Chevrolet | Chrysler Mechanic | Daewoo Mechanic | Dodge Mechanic | Eagle Mechanic | Fiat Mechanic | FordMechanic | GMC Mechanic | Geo Mechanic | Honda Mechanic | Hummer Mechanic | Hyundai Mechanic | Infiniti Mechanic | Isuzu Mechanic | Jaguar Mechanic | Jeep Mechanic | Kia Mechanic | Land Rover Mechanic | Lexus Mechanic | Iowa City Mechanic | Mazda Mechanic | Mercedes Benz Mechanic | MercuryMechanic | Mini Mechanic | Mitsubishi Mechanic | NissanMechanic | Oldsmobile Mechanic | Plymouth Mechanic | Pontiac Mechanic | Porsche Mechanic | SaabMechanic | Saturn Mechanic | Scion Mechanic | Smart | Subaru Mechanic | Suzuki | Toyota Mechanic | Volkswagen Mechanic | Volvo Mechanic
SERVICES
Mobile 30/60/90/120 Mile Services | Mobile Mechanic Ac / Heat Repair | Mobile Air Conditioning Repair & Service | Air Filter Repair Replacement | Mobile Mechanic Alternator Repair & Replacement | Antilock Braking System (Abs) Repair | Auto Maintenance | Axle Repair & Replacement | Battery Check And Replacement | Mobile Mechanic Belt Repair & Replacement | Bicycle Repair | Bike Repair | Boat Repair | Mobile Mechanic Brake Repair | Catalytic Converter Repair | Chassis & Suspension Repair | Check Engine Light Diagnostics & Repair | Clutch Repair & Replacement | Clutch, Gearbox And Shaft Repair | Compressor Repair & Replacement | Computer Diagnostic | Cooling System Repair And Replacement | Diagnosis | Diesel Repair | Differential Diagnosis | Differential Rebuild & Service | Dmv Certified Vehicle Inspection & Repairs | Dot Inspections | Mobile Mechanic Drivability Diagnostics & Repair | Driveline Repair & Maintenance | Driveshaft & U-Joint Repair |Mobile Mechanic Electric Window Repair | Electrical System Diagnostics & Repair | Emergency Auto Repair | Emergency Gas Delivery | Emission Testing | Mobile Mechanic Engine & Components Repair Replacement | Engine Management System Check | Engine Performance Check |Engine Repair | Engine Replacement |Mobile Mechanic Engine Swap | Evaporator Repair & Replacement | Exhaust Manifold Repair | Exhaust Repair & Replacement | Factory Scheduled Maintenance | Mobile Mechanic Filter Replacements |Mobile Mechanic Flat Tire Changes | Mobile Mechanic Fluid Services | Flywheel Repair & Replacement | Fuel Delivery | Fuel Injection Or Fuel Filter Repair | Fuel Pump Repair | Fuel System Repair & Maintenance | Gaskets, Belts, Hoses Repair Replacement | Mobile Mechanic Headlight Repair Replacement | Heating & Cooling System Diagnostics | Heating And Air Conditioning Repair | Ignition And Fuel Injection System | Jump Start |Mobile Light Repair & Bulb Replacements | Lockout Services | Maintenance Inspections | Mirrors And Accessories Replacement | Mobile Auto Repair | Mobile Mechanic | Mobile Truck Repair | Moped Repair | Muffler Repair & Replacement | Mobile Oil Change | Out Of Gas Help | Power Accessory Repair | Power Antenna Repair | Mobile Mechanic Power Lock Repair | Mobile Power Steering Repair | Power Window Repair | Mobile Mechanic Pre-Purchase Inspection | Mobile Mechanic Preventative Maintenance | Radiator Repair & Replacement | Mobile Radiator Repair Replacement | Refrigerant Replacement | Roadside Assistance | Rv Repair | Safety & Emissions Inspections | Mobile Mechanic Semi Truck Repair | Serpentine Belt Repair | Mobile Shocks & Struts Repair | Starter/ Solenoids Repair Replacement | State Emission Inspections & Repairs | Steering System Repair | Suspension – Shocks And Struts Repair Replacement | Mobile Mechanic Taillight Repair | Timing Belts Repair Replacement | Mobile Mechanic Tire Air Pressure Checks | Mobile Tire Balancing | Mobile Mechanic Tire Installations | Mobile Mechanic Tire Replacement | Tire Rotation | Toolbox Transportation | Mobile Transmission Fluid Service | Transmission Flush | Transmission Repair & Service | Truck Maintenance | Tune Ups | Mobile Used Car Inspection | Vehicle Inspection | Water Pump Repair & Replacement | Wheel Alignment | Winching Service |Mobile Windshield Wiper Blades | Mobile Windshield Wiper Repair
BEST TOWING, MOBILE MECHANIC, TOWING AND ROADSIDE ASSISTANCE , Mobile Mechanics of Iowa COMPANIES IN IOWA
IOWA CITY TOWING & ROADSIDE ASSISTANCE (319) 471-4590 roadsideassistanceiowacity.org
MOBILE MECHANICS OF IOWA CITY (319) 359-6136 mobileautotruckrepairiowacity.org
TOWING SERVICES OF IOWA CITY (319) 471-4238 towingiowacity.org
VEHICLES WE SERVICE:
Acura TL TLX NSX RDX MDX ILX RLX
Audi A4 A3 A6 A8 Q5 TT Q3 A5 R8 S6 RS S5 E-TRON
BMW i8 M5 M6 M550 M8 GRAN COUPE M240
Buick Enclave Encore LaCrosse Envision Cascada Regal
Cadillac CTS Escalade XT6 XT5 ATS CT6 CTS-V XTS XT4 CT5
Chevrolet Camaro Corvette Cruze Spark Tahoe malibu Colorado Traverse Suburban Impala Eqinox Blazer EV
Volt Sonic
Chrysler 300 Voyager Pacifica
Dodge Challenger Durango Journey Charger Grand Caravan
Fiat 500 500c 500x Spider
Ford Fiesta Fusion Taurus
GMC Yukon Sierra 1500 Acadia Terrain Canyon Yukon XL Savana Sierra 2500
Honda Civic Fit CR-V Accord HR-V Odyssey Insight Pilot Passport Ridgeline
Hyundai Tuscon Elantra Kona Santa Fe Accent Sonata Veloster Venue NEXO Palisade Ioniq Elantra
Infiniti Q50 QX80 QX50 QX60 Q60 QX30 Q70 Q70L M Q45 Q40
Jaguar XE XF XJ F-TYPE I-PACE E-PACE F-PACE
Jeep Wrangler Grand Cheroke Compass Renegade Gladiator
Kia Sportage Sorento Rio Optima Stinger Sedona Telluride Soul Forte K900 Cadenza EV
Land Rover Range Rover Defender Discovery Velar
Lexus IS ES GS GS F LS UX NX HYBRID RC LC UX 250 350
Lincoln Aviator MKC MKZ Navigator Continental MKT Corsair MKZ Hybrid
Mazda CX-5 Mazda3 Mazda6 MX-5 Miata CX-3 CX-30 CX-9 RF
Mercedes-Benz A-Class C-Class CLS E-Class CLA CLS
Mini Cooper Countryman Clubman
Mitsubishi Outlander Mirage Eclipse Galant Lancer Diamante Evolution Ralliart G4 VRX Olympic
Nissan GT-R LEAF Frontier Sentra Altima Pathfinder Maxima Murano Kicks Versa Rogue Titan NV200 Armada Versa Note Titan NV Cargo
Porsche 911 Cayenne Panamera Marcan Taycan 718 Cayman Boxster Turismo
Scion Yaris Corrolla XB FR-S TC XA XD IQ
Subaru BRZ Crosstrek Forester WRX Legacy Impreza Outback Ascent STI
Tesla Model 3 s x y
Toyota Corolla RAV4 C-HR Camry Land Cruiser Yaris Prius 86 Supra Highlander Tacoma Tundra Prius-C
4runner Sienna Mirai Avalon Sequoia
Volkswagen Golf Passat E-Golg Tiguan Beetle Jetta Arteon
Volvo XC90 XC60 S60 XC40 V60 V90 S90